Archive | food & drinks

Chocolate Chip Cookies


Chocolate chip cookies

What’s so special about these chocolate chip cookies?  You will have to make a batch to find out.  I have on file 4 or maybe 5 different chocolate chip cookie recipes that I like to use depending on how and why I’m making them;  crispy , chewy, chocolaty, etc…  But the one recipe that I tend to make again and again is a variation of the recipe from Cook’s Illustrated Magazine {January/February 1996}. This is also the one my kids requested the most.

Chocolate Chip Cookies

{print recipe, here}

Ingredients
4 ¼  cups unsifted bleached all-purpose flour
½  teaspoon salt
1  teaspoon baking soda
1 ½ cups unsalted butter, melted and cooled until warm
2  cups dark brown sugar
2/3 cup granulated sugar
3  large eggs plus 1 egg yolk
4  teaspoons vanilla extract
2-2½  cups semi-sweet chocolate chips

Directions
1.  Heat oven to 325 degrees.
2.  Mix flour, salt, and baking soda together in a bowl and set aside.
3.  In a large bowl, mix melted butter and sugars until thoroughly blended.  Mix in eggs, yolk and vanilla.  Add dry ingredients; mix until combined.  Stir in chips.

 Chocolate chip cookies4.   Use an ice cream scoop to form cookie dough into 1 1/2 inch balls.  Place formed dough onto parchment paper-lined cookie sheet, about 2 inches apart and 12 dough balls per cookie sheet.

.

Chocolate chip cookies
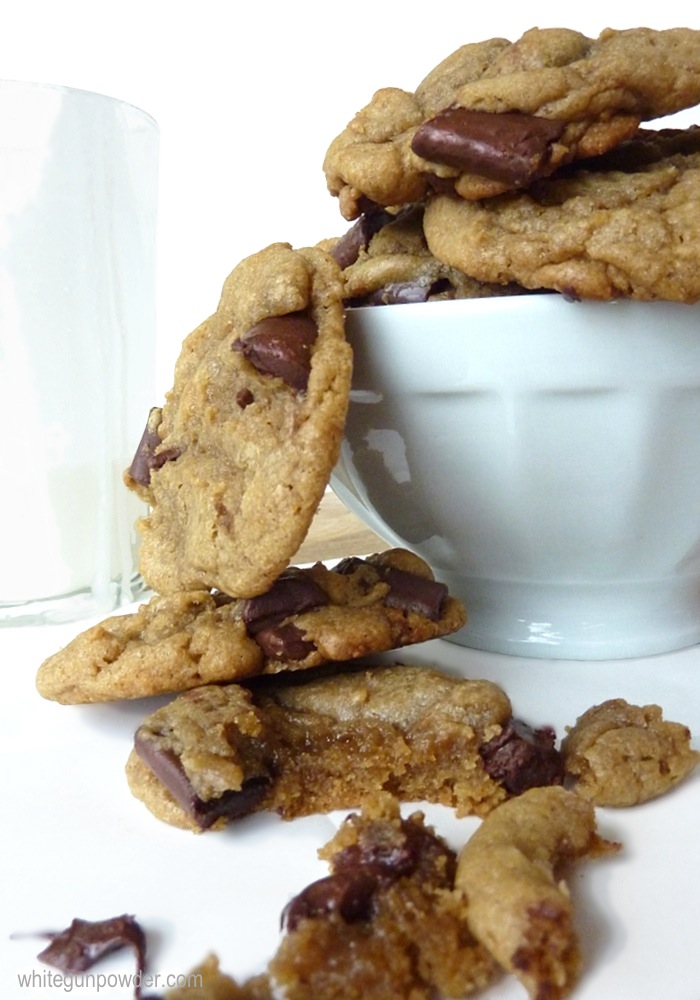
5.  Bake at 325 degrees for about 10-12 minutes.  The center of the cookies will still be soft and puffy {see image}.  Transfer the cookie sheet with the soft cookies still on it to a cooling rack and let the cookies rest for about 10 minutes.  They will be firm and cool enough to be taken off the cookie sheet.

.

Chocolate chip cookies

Without having said a word, I had three eager volunteers in the kitchen.  One by one they came to help; Caleb was the first, then Grace and Hannah came just in time to mix in the chocolate chips.  This recipe can easily be made by hand or a mixer.

Chocolate chip cookies

enjoy!    

{print recipe, here}


posted by: Kay

8 comments

Fresh Herbs & Compound Butter

fresh herbs

herbs


garden tags

Spring is here and my herb garden is coming back to life.  With this extra sunshine we’ve been having, they’ve perked up and grew a little taller and fuller.  Here I have put together a little sampling of herbs displayed on a cake stand and wrapped a few in parchment paper attached with custom tags {found here} using double sided tape.   It’s always wonderful to share with others what you grow in the garden.

{Free Printable Garden Tags, click here}

. . . . . . . . . . . . . . . . . . . . . . . . . . . . . .

.herbs for the garden

Fresh herbs in cooking is by far the best choice {see Compound Butter recipe below}.  My four favorite herb plants I use again and again from my garden are Italian parsley, basil, lavender and mint {not shown in the picture}.  Another reason for growing herbs is for decorating.  Instead of fresh flowers, add a pretty green bouquet of parsley next to the kitchen sink, mint in the bathroom or silver sage displayed in simple containers down the center of the table.  Herbs are hardy plants and easy to care for.  Give it a try if you have never grown them.

. . . . . . . . . . . . . . . . . . . . . . . . . . . . . .

.

compound butter, herb & lemon

.

compound butter, herb & lemon

 .

Herb Lemon Compound Butter 

Ingredients

8 Tbs. (1 stick) unsalted butter, at room temperature
1 Tbs. chopped fresh flat-leaf parsley
1 Tbs. chopped fresh chives
2 tsp. fresh lemon juice
1 tsp. lemon zest
salt and  freshly ground black pepper

Directions

 Combine the first 5 ingredients in a bowl.  Add salt and ground black pepper to taste.    Scoop it all onto the plastic wrap or divide the mixture in half {about 4 Tablespoons each}.  Roll the plastic wrap around it to form a cylinder then twist the ends closed.   Then wrap it in parchment paper, twist the two ends and tie the ends with twine.  Refrigerate until the butter is firm {about 2 hours} or put in the freezer to be used at a later date.

* Butter mixed with other ingredients {herb & spices, vanilla, honey, nuts, garlic, olives, sundried tomatoes, etc…} is known as compound butter.  It adds flavor to seafood, meat, bread and vegetables.


………………………………………………………………………………………………..

posted by: Kay                   9

9 comments

Citrus-Herb Seasoning Salt


Citrus-Herb Seasoning Salt

.

Citrus-Herb Seasoning Salt 2

.

From spring into summer I have the citrus seasoning salt sitting right next to my salt and pepper on the kitchen counter.  A hand reach away for when I need to add it to what’s cooking.

Citrus-Herb Seasoning Salt

3/4 cup  coarse salt (Coarse Kosher Salt)
2 Tablespoons  lemon zest
4 teaspoons  dried rosemary
3 teaspoons  dried thyme
3 teaspoons  dried oregano
1/2 teaspoon sugar
1/2 teaspoon  paprika
1/2 teaspoon  red-pepper flakes

Combine all the ingredients in a bowl.   Store in an airtight container, up to 3 months.  Makes 1 Cup

Ideas & Uses

○  sprinkle on chicken, pork or fish before baking/cooking
○  add to balsamic vinegar and extra-virgin olive oil dipping sauce for bread
○  sprinkle over popcorn, pasta, cream cheese dip & garlic bread

.

recipe source:  Martha Stewart Everyday Food Magazine, December 2011

. . . . . . . . . . . . . . . . . . . . . . . . . . . . . . . . . . . . . . . .packaging

packaging salt

.

 Salt packaging-3

This packaging idea came about because I needed a quick way to package the salt seasoning mix as gifts and I didn’t have lids for the jelly jars.  They turned out cute so I wanted to share it.

Materials

small glass containers  (jelly jars-3) ⎪ plastic wrap ⎪ double sided tape ⎪ twine ⎪ scissors (decorative scissors-optional) ⎪ labels (see below to print free labels)

Directions

1.  Fill the glass container(s) to the desired amount.

2.  Seal the top opening with 2 layers of plastic wrap and trim off excess leaving about    3/4-1 inch along the sides of the container.

3.  Wrap twine 2 – 3 times around the container to secure the plastic wrap edges (clear tape will work too or do both).

4.  Print, cut and attach the label to the top of the container with the double sided tape (see image above).

{click here to print labels}

.

citrus seasoning salt jars .

Come back and tell us how you used the citrus-herb seasoning salt.

………………………………………………………………………………………………..

posted by: Kay             3

3 comments

Chili


Chili 1

. . . . . . . . . . . . . . . . . . . . .

This recipe has evolved over the years with varying input from the family.  Since Bill likes it chunky, big chunks of beef were added.  The kids like small black and white beans but I like the kidney and lima beans, so we put them all in.  But it became too much.  Now we limit them to two or three varieties.  Because it was too spicy for the kids, the cayenne was reduced.  As you can see, this chili recipe can be changed and in the end it will turn out delicious.

Chili

Ingredients

  • 2 pounds of beef stew meat (cut into 1 – 2 inch cubes) 
  • 1/4 cup flour
  • 1/2 teaspoon salt
  • 1/4 teaspoon pepper
  • 3 Tablespoons canola oil                                             
  • 2 Tablespoons olive oil
  • 1 large onion, chopped (1 1/2 cups)
  • 1 green pepper, chopped (1 cup)
  • 2 cloves garlic, minced
  • 2 pounds ground lean beef
  • 2 bay leaves
  • 2 teaspoons chili powder
  • 1 teaspoon oregano
  • 1/4 teaspoon black pepper
  • 1/2 teaspoon salt (more if needed when the chili is done)
  • 1/8 teaspoon cayenne (more if you like spicy)                                              
  • 2 or 3  (16 oz) cans beans, drained and rinsed (kidney, black, white, or lima beans)
  • 1 (16 oz) can tomato sauce
  • 2 Tablespoons tomato paste
  • 1 Tablespoon mollasses
  • 1/2 teaspoon Worcestershire sauce
  • 8 cups beef broth

STEP 1  In a sealable plastic bag, mix flour, 1/2 tsp salt & 1/4 tsp black pepper.  Add beef stew chunks to the bag and shake to lightly coat the beef.  Add 2 Tablespoons canola oil into an oven safe pot and heat it on medium-high.  Brown the beef chunks in batches (do not over crowd the pot).  Use the last Tablespoon of canola oil as needed.  Set the brown beef chunks aside in a bowl, they will still be pink on the inside.  I don’t brown all the sides, just the top and bottom (see pic 1).  Repeat this step with the rest of the beef chunks.

STEP 2  In the same pot without the beef, add olive oil and sauté onion, green pepper and garlic over medium heat until soft (5 minutes).  Turn the heat back up to medium-high and add ground beef, bay leaves, chili powder, oregano, 1/4 tsp black pepper, 1/2 tsp salt and cayenne and cook for another 5-7 minutes.

STEP 3  Add the beef chunks back into the pot along with beans, tomato sauce and paste, molasses, Worcestershire sauce, and beef broth.

STEP 4  Bring the heat up to high.  When the chili starts to bubble, turn the heat off and cover it with a lid.

STEP 5  Put the pot in the oven at 350° F for 2 hours.

STEP 6  The liquid will be reduced down and thickened and the beef chucks will be very tender.

Garnish your chili with cheese, avocado, green onions, cilantro, corn chips, lime or extra hot peppers.

Chili


 Chili

enjoy!

………………………………………………………………………………………………………….

posted by: Bill & Kay         3

3 comments

Super Bowl Snacks and Crafts

Football season will be coming to an end a few days from now and the Super Bowl game will determine the champion of the National Football League (NFL).  Bill and I grew up watching football every Sunday, the New England Patriots for Bill and the Denver Broncos for me.   And as for our kids growing up in Washington state, the Seattle Seahawks.  Here I have put together a few snacks and crafts for Super Bowl Sunday:  a big bowl of popcorn, pizza, treats and your favorite drinks all on a  football field table cover.

Super bowl snacks -2

.Kraft paper football field

diy kraft paper football field

The football field table cover project came from Karin Lidbeck-Brent’s Fall tailgate party ideas.  This was fairly easy to make using brown Kraft paper, masking tape to make straight lines and a black Sharpie pen to write the numbers.

.

Super Bowl Party FavorsSuper bowl paper footballs

Super bowl paper footballsThe football favors are fun to make.  Copy the image onto your computer and adjust the size.  I printed the image on one side of the paper and fold it in half.  Keeping the image on top and as a template for the other half and cut the pieces out.  A total of  4 football pieces and one lace.  Use a glue stick, to glue the edges together to form a football.  Fill it with treats and seal it up.  football template {click here}

.

Super Bowl Pizzapizza

pizza

I had my little helper Caleb put together the pizza, all I did was rolled the pizza dough out and put it in the oven.  We made 4 pizzas from the two bags of Trader Joe’s pizza dough.

Ingredients

Trader Joe’s Pizza Dough (1 bag makes 2, 12inch pizzas)
1/4 – 1/2 Cup Pizza Sauce
8 – 10 oz Mozzarella Cheese
Pepperoni slices

  1. Place a pizza stone on a rack in the lower third of your oven.  Preheat the oven to 450°F.
  2. Line the counter top with parchment paper and sprinkle with flour.  Take the pizza dough out of the bag and divide it in half.  Roll them into balls and let them rest on the counter for 15 to 20 minutes.
  3. Roll out the pizza dough with the rolling pin to about 12 inches in diameter.
  4. Spread a thin layer of pizza sauce on the pizza dough (almost to the edge). Sprinkle on mozzarella cheese and top it with pepperoni slices.
  5. Lift the parchment paper with the pizza and set it on top of the pizza stone in the oven (a cookie sheet will work just fine).  Bake for approximately 10-12 minutes.

_________________________________________________________

.

Super Bowl & legos

 After I finished putting together the football field table cover and started to gather the food for the table, my 8 year old son Caleb came to me and said he wanted to help.  I said, “That will be great!”  Right away he went to work without ever asking what he could help “me” with.  Our dining table is about nine feet long, lots of room for us to share. While I was working on one end, my son was at  the other end of the table quietly working on his Lego project.  As you can see, we had two visions of what to do with the paper football field, you either eat on it or play a game of Lego football.  He had a great setup with grand stands, fans, mascots, announcers, and a field with goal posts and players.  I thought he was pretty clever.

enjoy the Super Bowl!


………………………………………………………………………………………………………….

posted by: Bill & Kay         2

Related Posts Plugin for WordPress, Blogger...
2 comments