Christmas is the celebration of the birth of our Savior, Jesus Christ. “For God so loved the world, that He gave his one and only Son, that whomever believes in Him shall not perish, but have eternal life.” (John 3:16)
Decorating gingerbread houses is a tradition the kids look forward to every year including Bill and me. It’s a day of unlimited sweets and encouraging the kids to eat as much candy as they like! But often times, they are too busy decorating to take the time to eat the sweets that are in front of them.
.
All the gingerbread houses were prepared a few days before the party. Once the pieces have been glued together with icing and hardened, the houses will be strong and easy to move around without breaking apart. I think there were about 30 houses total.
.
The gingerbread houses are ready to be decorated.
. . . . . . . . . . . . . . . . . . . .
Gingerbread House
Ingredients
print gingerbread house templates, Here
{makes 3 gingerbread houses}
6 cups sifted all-purpose flour
1 teaspoon baking soda
1/2 teaspoon baking powder
1 cup unsalted butter, at room temperature
1 cup dark brown sugar, packed
2 teaspoon ground ginger
1 teaspoon ground cloves
1 teaspoon salt
1 Tablespoon ground cinnamon
2 large eggs
1 cup unsulfured molasses
Instructions
1. In a large bowl, sift together flour, baking soda, baking powder, ground ginger, ground cloves, ground cinnamon and salt. Set aside.
2. In bowl of an electric mixer fitted with a paddle attachment, cream butter and brown sugar on medium speed until fluffy. Mix in eggs and molasses. Reduce speed to low and add flour mixture until combined.
3. Divide dough into thirds and wrap them in plastic. Refrigerate at least 2 hours.
4. Heat oven to 350° .
5. On a floured work surface, roll out dough {about 1/8″ thick}. Place the templates on the dough and cut around it with a knife. Transfer to baking sheet lined with parchment paper. Refrigerate until firm {10-15 minutes}.
6. Bake 8-10 minutes. Cool on wire racks.
7. Assemble the gingerbread house pieces starting with the four walls and end with the roof. Be very generous with the icing when glueing the pieces together. The icing will also help hide any rough edges and uneven pieces.
. . . . . . . . . . . . . . . . . . . .
Royal Icing
Ingredients
{makes 4 1/2 -5 cups}
2 pounds of confectioners’ sugar
4 tablespoons meringue powder
½ teaspoon vanilla extract
¾ – 1 cup of water
Instructions
In bowl of an electric mixer fitted with a wire whisk attachment {or the paddle attachment}, combine confectioners’ sugar, meringue powder, vanilla, and ½ cup of water. With the mixer on low speed, add the remaining water as needed a little at a time until the mixture reaches the desired thickness. Increase the mixer speed to medium-high, whisk for about 4-5 minutes until soft glossy peaks form. * I made the icing for assembling the gingerbread pieces a little thicker than for decorating.
.
Disposable Pastry Bags make it quick and easy to decorate and eliminate messy cleanup. Fill a disposable pastry bag with icing and tie a knot at the top. With a pair of scissors, cut a hole {1/8″-1/4″ wide} at the bottom tip of the bag. It is ready to be used.
. . . . . . . . . . . . . . . . . . . .
.
Decorating the Gingerbread House
Use a cardboard cake circle as the base for the gingerbread house to stand on and to move it around easily.
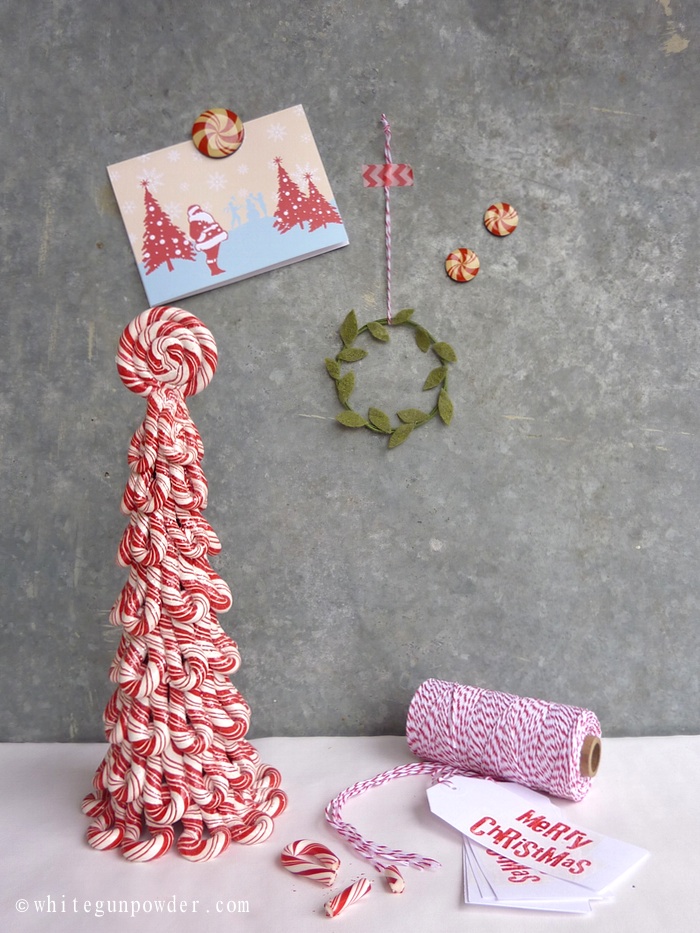
These simple felt wreaths came about because of my two bare walls in the house that needed some Christmas decorations. In less than an hour I was able to make two large felt wreaths from the supplies I have on hand. The mini felt wreath is even easier to make. Hang it on the Christmas tree or attach it to a package.
.
I like the idea of hanging a wreath in front of a picture frame or a bulletin board.
. . . . . . . . . . . . . . .
Tutorial for Felt Wreaths
Supplies
• double ring wreath forms {12″ diameter}
• felt sheets, assorted colors {9″ x 12″}
• ribbons and twine
• glue gun & glue sticks
• scissors
• simple leaf templates, print Here {approximately 2 1/2″ long by 1 1/4″ in width}
for mini felt wreath • green cloth covered stem wire 18 gauge {18 inches long}
• strong paper tube {2 1/4″ diameter} or something similar, to use as a tool to wrap and shape the wire into a circle – mine came from an empty ribbon paper tube
Mini Felt Wreath
Choose a felt color to be wrapped around the wire frame. Cut long one-inch wide strips from the felt sheet. There should be 9 strips total. Take one felt strip and dab a pea-size hot glue near the beginning of the felt and quickly wrap the strip once around the wire frame to secure it. Once the felt strip is attached, start wrapping it around the frame. Glue down the end of the strip and repeat the steps again until the wire frame is completely covered. It will take 7-9 felt strips.
Arrange the cut leaf pieces around the frame, but do not hot glue them down until you are satisfied with how they look on the wreath..
The finished felt wreath.
Mini Felt Wreath
step 1 & 2
Take the 18″ wire and wrap it around the paper tube.
step 3
Take the circular wire shape of the tube and twist it around itself 3-4 times to secure the circular wire shape.
step 4
arrange mini leaf shapes around the wire circle and hot glue them to the wire.
My must see movie of the year, The Hobbit, The Desolation of Smaug. This is the 2nd of 3 Hobbit trilogy produced and directed by Peter Jackson to be released on December 13, 2013. To ease the long wait, the DVDs of the 1st Hobbit movie, The Unexpected Journey and the other trilogy, The Lord of the Rings have been watched often in the past months leading up to now. These fantasy film adventures were adapted from J.R.R. Tolkien’s works, The Hobbit and The Lord of the Rings novels. Tolkien’s stories are incredibly well written and the fantasy world he created influenced and impacted many of the modern fantasy novels.
Here’s a sneak peek of The Hobbit, The Desolation of Smaug.
Martin Freeman as Bilbo Baggins inside the Lonely Mountain to face the dragon.
.
The return of Orlando Bloom as elven Legolas and a new woodland Elf Tauriel played by Evangeline Lilly.
To the movie we go… a great outing for our family. A “relaxing” time for me personally, to escape from the hectic and busy Christmas season and enjoy the movie.
How about you, will you go see the movie too?
Cranberry relish is not just for Thanksgiving dinner in our family. My two daughters will take a bowl like this one and eat all of it up {I will too}. This recipe is full of “Stuff”; the combination of sweet/tart and soft/chunky in every bite. It’s a great side dish with turkey or warm it up and spoon it over chicken or pork. This cranberry relish with pear and orange is a twist on the classic cranberry sauce.
1 1/2 cups sugar
1/2 cup fresh orange juice
3-4 oranges, segmented {without pith and membranes}
2 Bartlett pears {firm and slightly green}, peeled and cubed to bite size
1 pound fresh cranberries {one 12 oz bag of cranberries will work fine}
1/2 cup water
zest of one orange
{makes 4 cups}
. . . . . . . . . . . . . . . .
Tips & How to’s
Orange Zest
Use a microplane to grate the thin outer layer of an orange, careful not to scrape the white bitter part of the rind.
.
Segmented Oranges
steps 1 & 2
Cut the top and bottom of the orange to expose the inner flesh. Set it down on one end and with a knife start from the top, cut the rind downwards just inside the pith. Repeat this procedure all the way around the orange until the flesh is completely exposed.
step 3
Hold orange over a bowl, slice the knife into the orange along the membranes to separate the segments. Continue around the orange and place each segment into the bowl below.
step 4
After all the segments are removed, squeeze the orange to extract the last bit of the juice.
.
. . . . . . . . . . . . . . . .
Cooking Instructions
1. Combine sugar, orange juice, water and cranberries in a medium saucepan. Cook over medium heat until the berries pop open {about 10-15 minutes}.
2. Add pears and cook for 5 minutes.
3. Turn heat off and add orange zest and segments and stir.
4. Start the canning process or let it cool to room temperature and refrigerate.
The canning process can be done with equipment you probably already have, but the one canning tool I recommend as a must have is a jar lifter. It makes the process much easier and safer when transfering a jar in and out of the hot water without it slipping.
1. Sanitize canning jars and keep them warm. Prepare the lids according to the package directions.
2. Fill a large pot with water enough to cover the jars by 1 inch. Heat the water up to a broil {not roaring boil}
3. Ladle the relish into warm jars, leaving approximately 1/2 inch of space at the top.
4. Wipe the rim of the jar with a clean, damp paper towel.
5. Place the lid and ring on the jar. Hand-tighten the canning ring.
6. Place a rack for the jars to stand on in the pot {the jars should not be touching the bottom of the pot}
7. Place the jars into the hot water bath making sure they are not touching each other or the bottom of the pot. Add more water if needed to cover the jars by 1 inch.
8 Process the jars for 15 minutes, keeping the water at a gentle boil for the entire time.
9. Remove the jars from the water and allow them to sit undisturbed for 24 hours. As the jars cool down, a popping sound will occur from the lid as an indicator of a good seal.
. . . . . . . . . . . . . . . .
.
Packaging Supplies • brown paper / paper bags • rubber bands • white crinkled shredded paper/grass
• cello bags {5″x3″x11″} • ribbon • double-sided tape • cardboard pieces {2 1/2″ x 4″} • white café au lait bowls, 8 oz capacity {BIA Cordon Bleu or Apilco} • labels {print Here} • template for the jar cover {print Here}
Instructions
Use the template provided Here and trace out the jar lid cover on brown paper/paper bag. Stick a piece of double sided tape to the top of the jar lid at the center and attach a brown paper circle cutout. Stick another piece of double sided tape on top of the paper cover and attach a label {print Here}. Fold the edges of the paper and label down and over the sides of the lid. Stretch a rubber band around the sides of the lid to secure the paper cover and label in place.
.
.
Gift Wrapping
The last few steps to wrap the gift. Place a piece of cardboard inside the cello bag for the bowl to stand on. Add crinkled paper grass inside the bowl then a jar of cranberry relish. Tie the cello bag with a ribbon and that is it.
Instead of a jar of cranberry relish, substituting it with jam, cookies or pastries will be just as wonderful to give this Christmas.


