Every summer I look forward to the bounty of fresh fruits and vegetables locally grown or shipped from nearby cities. The kids love them and it becomes a regular item on the dinner table to enjoy.
I wanted to capture the beauty of the last bit of summer harvest before they disappear and a new season begins.
.
Pears picked from our neighbor’s pear tree to be made into poached pears, simply delicious. We’ll be sharing the recipe in a future post.
.
Simply Beautiful!
This large bowl of fresh picked plums from Lynn Morris’s garden was the inspiration for this post.
.
An abundance of tomatoes from my vegetable garden.
Blueberry Buckle is an old-fashinon single-layer cake with a streusel topping. This is a wonderful and versatile cake that’s also great to serve for breakfast, brunch and anytime {with tea/coffee}. The consistency is like coffee cake but not as sweet.
Before going any further about Blueberry Buckle, I want to share where these plump blueberries came from. Everyone in the family was busy except for my son Caleb and me so we decided to go blueberry picking at a nearby farm. Bybee Blueberry Farm is situated at the base of Mount Si offering incredible views while picking these sweet blueberries.
So ready for picking!
For about an hour of picking {and a little bit of eating}, we got almost 9 pounds of blueberries.
These blueberries have been washed and ready to be eaten in these fun snack cups. Blueberries are one of the best snacks. They are rich in antioxidants, full of vitamin C, manganese and fiber.
2 cups all-purpose flour
1 1/2 teaspoons baking powder
1/2 teaspoon salt
3/4 cup sugar
1/2 cup unsalted butter {room temperature}
1 egg
1 teaspoon pure vanilla extract
1/2 cup milk
5 cups blueberries {can use frozen blueberries}
STREUSEL TOPPING
1 teaspoon ground cinnamon
1/4 teaspoon salt
1/4 cup packed brown sugar
1 cup flour
1/2 cup unsalted butter {room temperature}
Heat oven to 350°. Butter and flour springform baking pan {ten-inch round}.
STEP 1. In a bowl of an electric mixer cream butter and sugar on medium speed until light and fluffy.
STEP 2. Add egg and vanilla and mix until combined.
.
STEP 3. In a medium bowl, sift together the flour, baking powder, and salt. Reduce mixer speed to low, alternate adding reserved flour mixture and milk to mixer, beginning and ending with flour mixture.
STEP 4. Gently fold in blueberries {all 5 cups}. If using frozen blueberries, sprinkle 1 tablespoon of flour over the berries and mix gently to coat each berries with flour before adding to the batter mixture.
.
STEP 5. Pour batter into prepared pan {butter and flour springgorm baking pan}.
In a medium bowl, mix together all the streusel topping ingredients with a fork to form large clumps.
.
STEP 6. Sprinkle streusel topping directly onto the cake batter.
Place the springform baking pan on a cookie sheet lined with parchment paper. This will help to contain any leakage from spreading all over the oven. Bake 60 to 70 minutes until cake tester comes out batter free. Remove cake from oven and let it rest on the cooling rack for 10 minutes.
Lynn Morris classic potato salad uses simple ingredients and is simply delicious… for breakfast, lunch, dinner and a late night snack. I have truly done all that. Lynn Morris introduced this potato salad recipe to me 20+ years ago at her cafe, The Sweet Addition. Lynn has since retired from the business and sold it many years ago. But I can say that it has been tried, approved and enjoyed by many customers. The recipe will make a nice big batch to take to a potluck or a gathering.
Ingredients
4 lbs peeled & cut into bite size {1/2 – 3/4 inch} Russet potatoes
7 large hard broiled eggs cut into big chucks
10-14 cooked bacon strips, chopped and reserve some to sprinkle on top . {baking bacon instructions click HERE}
1 cup mayonaise
1 cup chopped green onions/scallions
1 teaspoon Dijon mustard {not shown in pic}
1 tablespoon salt {add to cooking water}
salt & pepper to taste
Directions
Place the cut potatoes and 1 tablespoon of salt (do not skip this step) in a large pot with just enough cold water to cover them. Bring the water to a boil, then lower the heat to med/high and simmer for about 10-12 minutes, until the potatoes are tender and still hold their shape when pierced with a knife. Drain the potatoes in a colander and let it sit to cool for 20-30 minutes. Transfer the potatoes into a large bowl, cover and refrigerate until cold.
Assembling: Into the bowl with cold potatoes, add all the ingredients and toss, cover and refrigerate. Sprinkle with reserved chopped bacon pieces on top before serving.
This is a very forgiving salad, add more or less of any of the ingredients depending on how you like it.
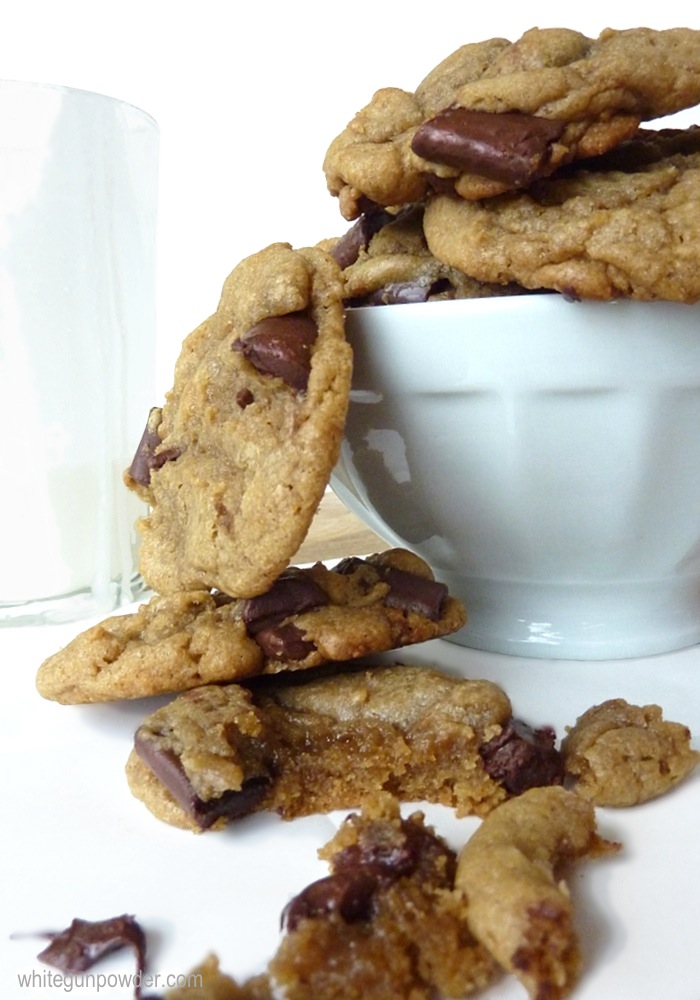
What’s so special about these chocolate chip cookies? You will have to make a batch to find out. I have on file 4 or maybe 5 different chocolate chip cookie recipes that I like to use depending on how and why I’m making them; crispy , chewy, chocolaty, etc… But the one recipe that I tend to make again and again is a variation of the recipe from Cook’s Illustrated Magazine {January/February 1996}. This is also the one my kids requested the most.
Ingredients
4 ¼ cups unsifted bleached all-purpose flour
½ teaspoon salt
1 teaspoon baking soda
1 ½ cups unsalted butter, melted and cooled until warm
2 cups dark brown sugar
2/3 cup granulated sugar
3 large eggs plus 1 egg yolk
4 teaspoons vanilla extract
2-2½ cups semi-sweet chocolate chips
Directions 1. Heat oven to 325 degrees.
2. Mix flour, salt, and baking soda together in a bowl and set aside.
3. In a large bowl, mix melted butter and sugars until thoroughly blended. Mix in eggs, yolk and vanilla. Add dry ingredients; mix until combined. Stir in chips.
4. Use an ice cream scoop to form cookie dough into 1 1/2 inch balls. Place formed dough onto parchment paper-lined cookie sheet, about 2 inches apart and 12 dough balls per cookie sheet.
.
5. Bake at 325 degrees for about 10-12 minutes. The center of the cookies will still be soft and puffy {see image}. Transfer the cookie sheet with the soft cookies still on it to a cooling rack and let the cookies rest for about 10 minutes. They will be firm and cool enough to be taken off the cookie sheet.
.
Without having said a word, I had three eager volunteers in the kitchen. One by one they came to help; Caleb was the first, then Grace and Hannah came just in time to mix in the chocolate chips. This recipe can easily be made by hand or a mixer.
From spring into summer I have the citrus seasoning salt sitting right next to my salt and pepper on the kitchen counter. A hand reach away for when I need to add it to what’s cooking.
Combine all the ingredients in a bowl. Store in an airtight container, up to 3 months. Makes 1 Cup
Ideas & Uses
○ sprinkle on chicken, pork or fish before baking/cooking
○ add to balsamic vinegar and extra-virgin olive oil dipping sauce for bread
○ sprinkle over popcorn, pasta, cream cheese dip & garlic bread
.
recipe source: Martha Stewart Everyday Food Magazine, December 2011
This packaging idea came about because I needed a quick way to package the salt seasoning mix as gifts and I didn’t have lids for the jelly jars. They turned out cute so I wanted to share it.
Materials
small glass containers (jelly jars-3) ⎪ plastic wrap ⎪ double sided tape ⎪ twine ⎪ scissors (decorative scissors-optional) ⎪ labels (see below to print free labels)
Directions
1. Fill the glass container(s) to the desired amount.
2. Seal the top opening with 2 layers of plastic wrap and trim off excess leaving about 3/4-1 inch along the sides of the container.
3. Wrap twine 2 – 3 times around the container to secure the plastic wrap edges (clear tape will work too or do both).
4. Print, cut and attach the label to the top of the container with the double sided tape (see image above).


 .
. .
. .
. .
. .
. .
.